Users Page
The Users Page in the Preferences section allows administrators to manage users, assign roles, and configure user access to different features within the platform.
User List
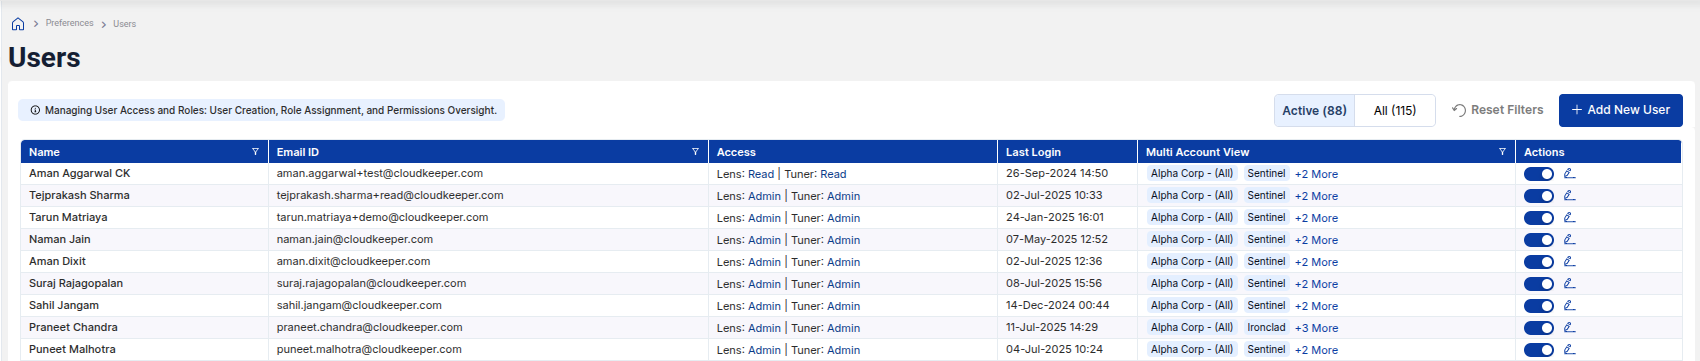
The User List displays all users in the system, along with their details, including Name, Email ID, Access Level (e.g., Lens, Tuner), and the Last Login information. You can easily filter, search, or view the details of any user from this list.
Example
In the image below, you can see a sample User List with the respective user details.
Add New User
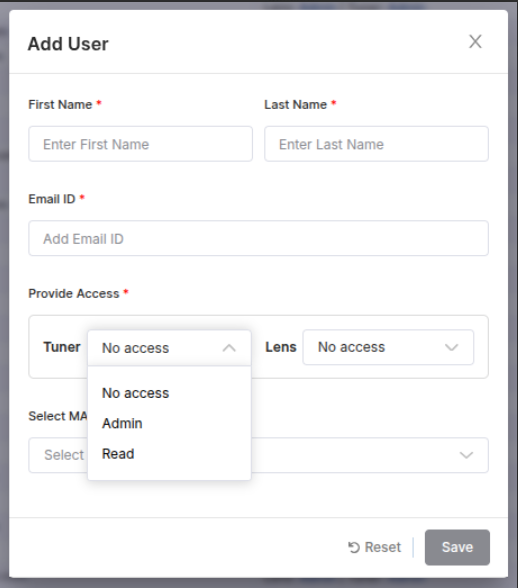
To add a new user, click the Add New User button. This will open a modal where you can enter the First Name, Last Name, and Email ID of the user. You will also need to assign roles for the user under the Lens and Tuner categories.
Users can be assigned different levels of access:
- Lens
- Tuner
Additionally, you can assign the user to a specific Multi-Account View (MAV) to give them visibility into the associated accounts.
Example
Below is an example of the Add New User modal where you can input user details and access.
Edit User Access
Once a user is added, you can edit their access levels, update their email address, or change their role. The Actions column of the user list provides options to edit or remove users as needed.
Delete User
If a user is no longer needed, you can remove them from the system by clicking the Delete button in the Actions column. Deleting a user removes their access to the platform and associated resources.