Tag-Based Scheduler
The Tag-Based Scheduler in CloudKeeper Tuner automates the start and stop of cloud resources based on resource tags and recurrence configurations. It provides a simple, scalable, and tag-driven way to manage non-production workloads across all onboarded AWS Accounts and Regions, helping reduce unnecessary costs while maintaining operational control.
What is Tag-Based Scheduling?
The Tag-Based Scheduler automatically filters all of your AWS resources based on their tags and applies a defined start-stop schedule to them.
Instead of manually selecting which instances or databases to schedule, you simply tell the system which tags to look for, such as Environment=dev or Project=AppX.
The scheduler then automatically discovers every resource that matches those tags.
You can also apply additional filters for specific AWS accounts and regions, and even combine multiple tags using logical operators like AND, OR, and NOT.
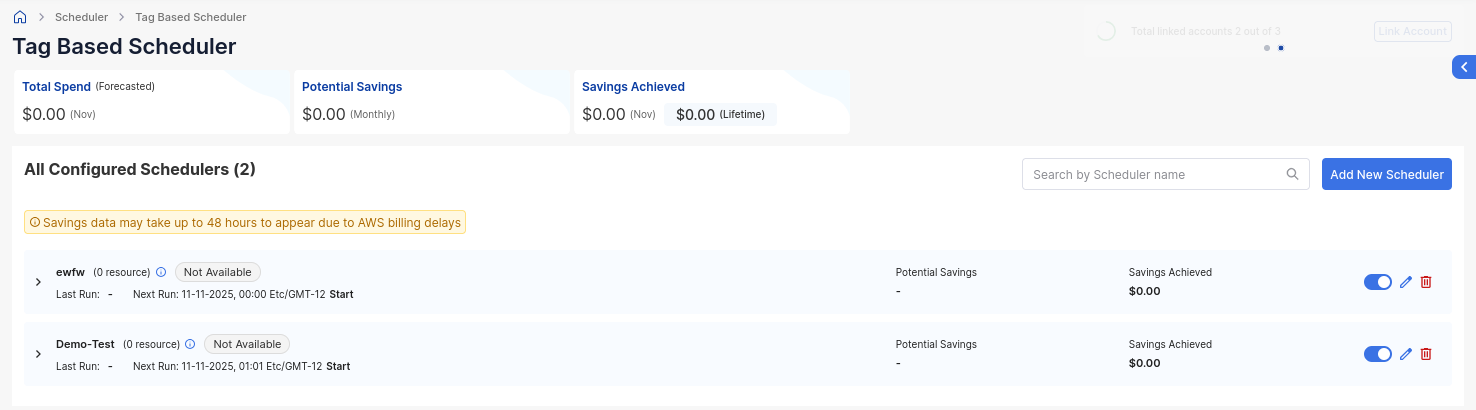
Compared to the Resource-based scheduler, the Tag-Based Scheduler also provides granular execution visibility: which resources the scheduler ran successfully or failed for, the last action (start/stop) and timestamp, plus the next action and when it will occur.
Supported services: EC2, RDS, Redshift, Auto Scaling Groups (ASG), ECS Fargate, and SageMaker.
Configuring a Tag-Based Scheduler
Step 1 — Click the Add New Scheduler button on the top right corner
This will open the Configuration Dialog box for the tag-based scheduler.
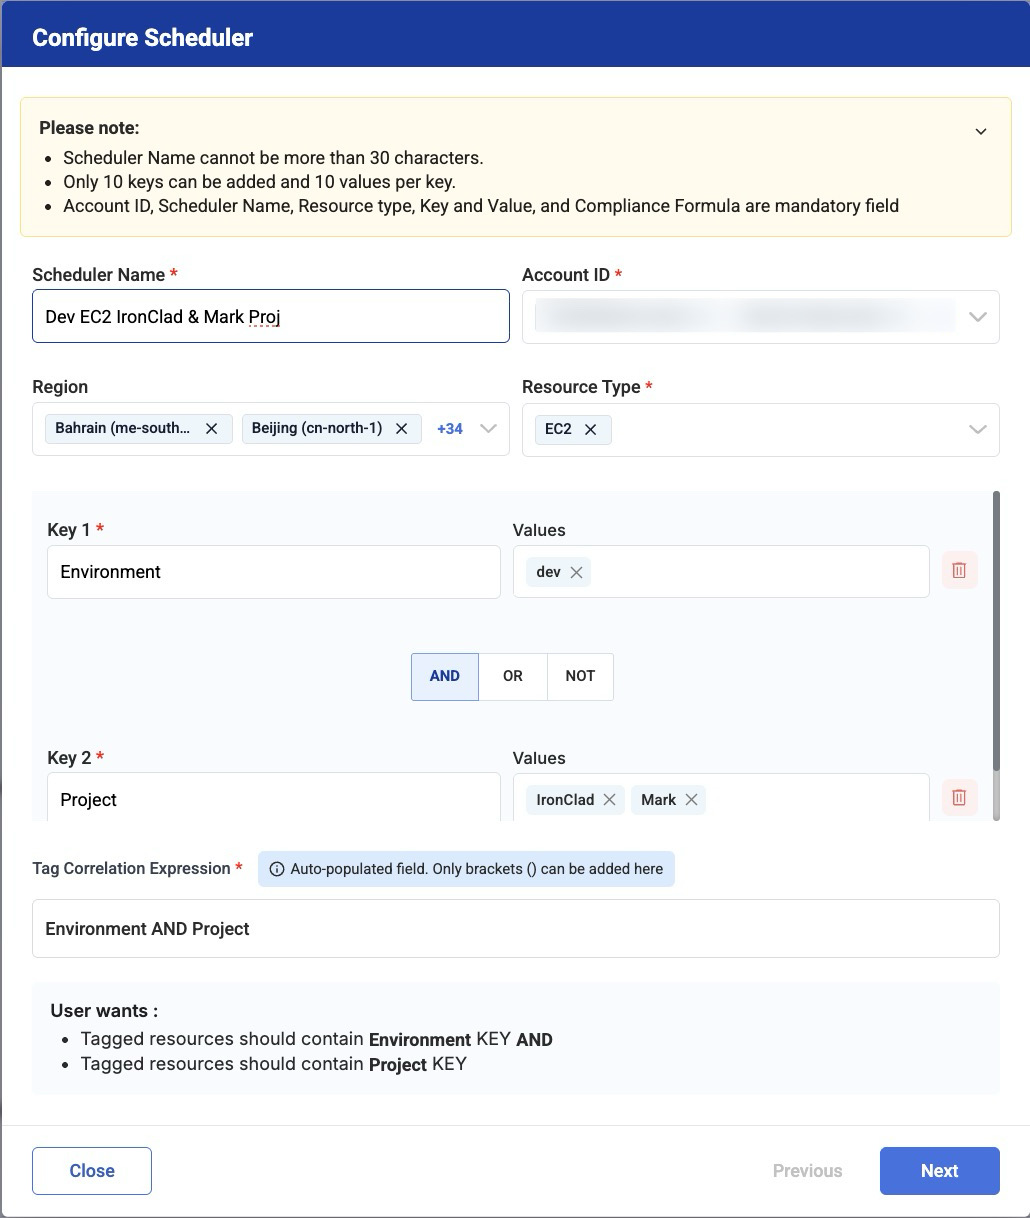
Step 2 — Define Scope
Select the AWS Accounts, Regions, and Resource Types for which the scheduler should operate.
Step 3 — Define Tagging Correlation Expression
Set up the tag-based logic that determines which resources will be affected.
You can create expressions using AND, OR, and NOT to combine multiple tags.
For example:
Environment = dev AND Project = AppX→ narrow matchEnvironment = dev OR Project = test→ broader match
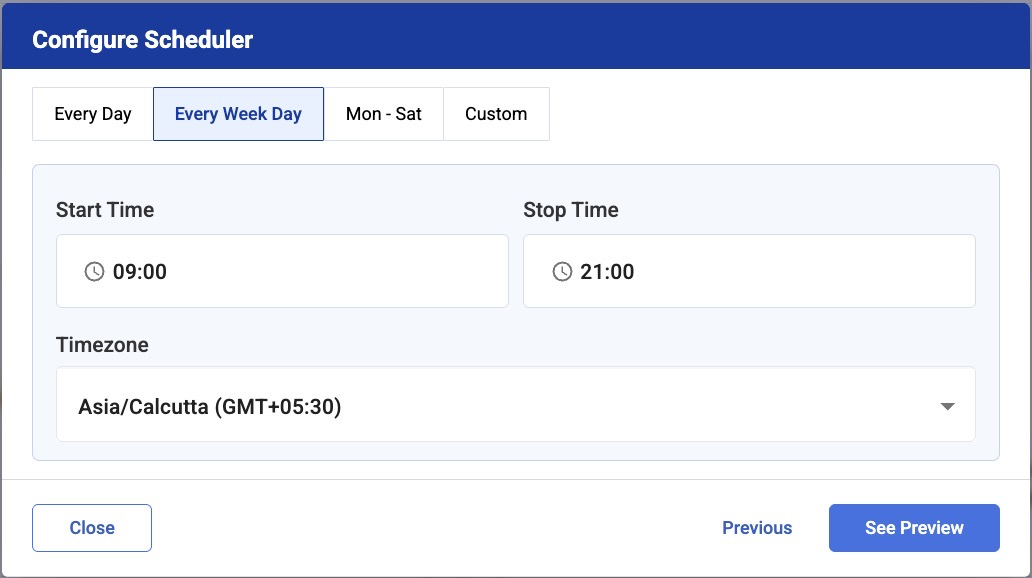
Step 4 — Define Recurrence
Specify when you want the scheduler to run using recurrence expressions such as daily, weekly, or specific weekdays, with chosen start/stop times and time zone.
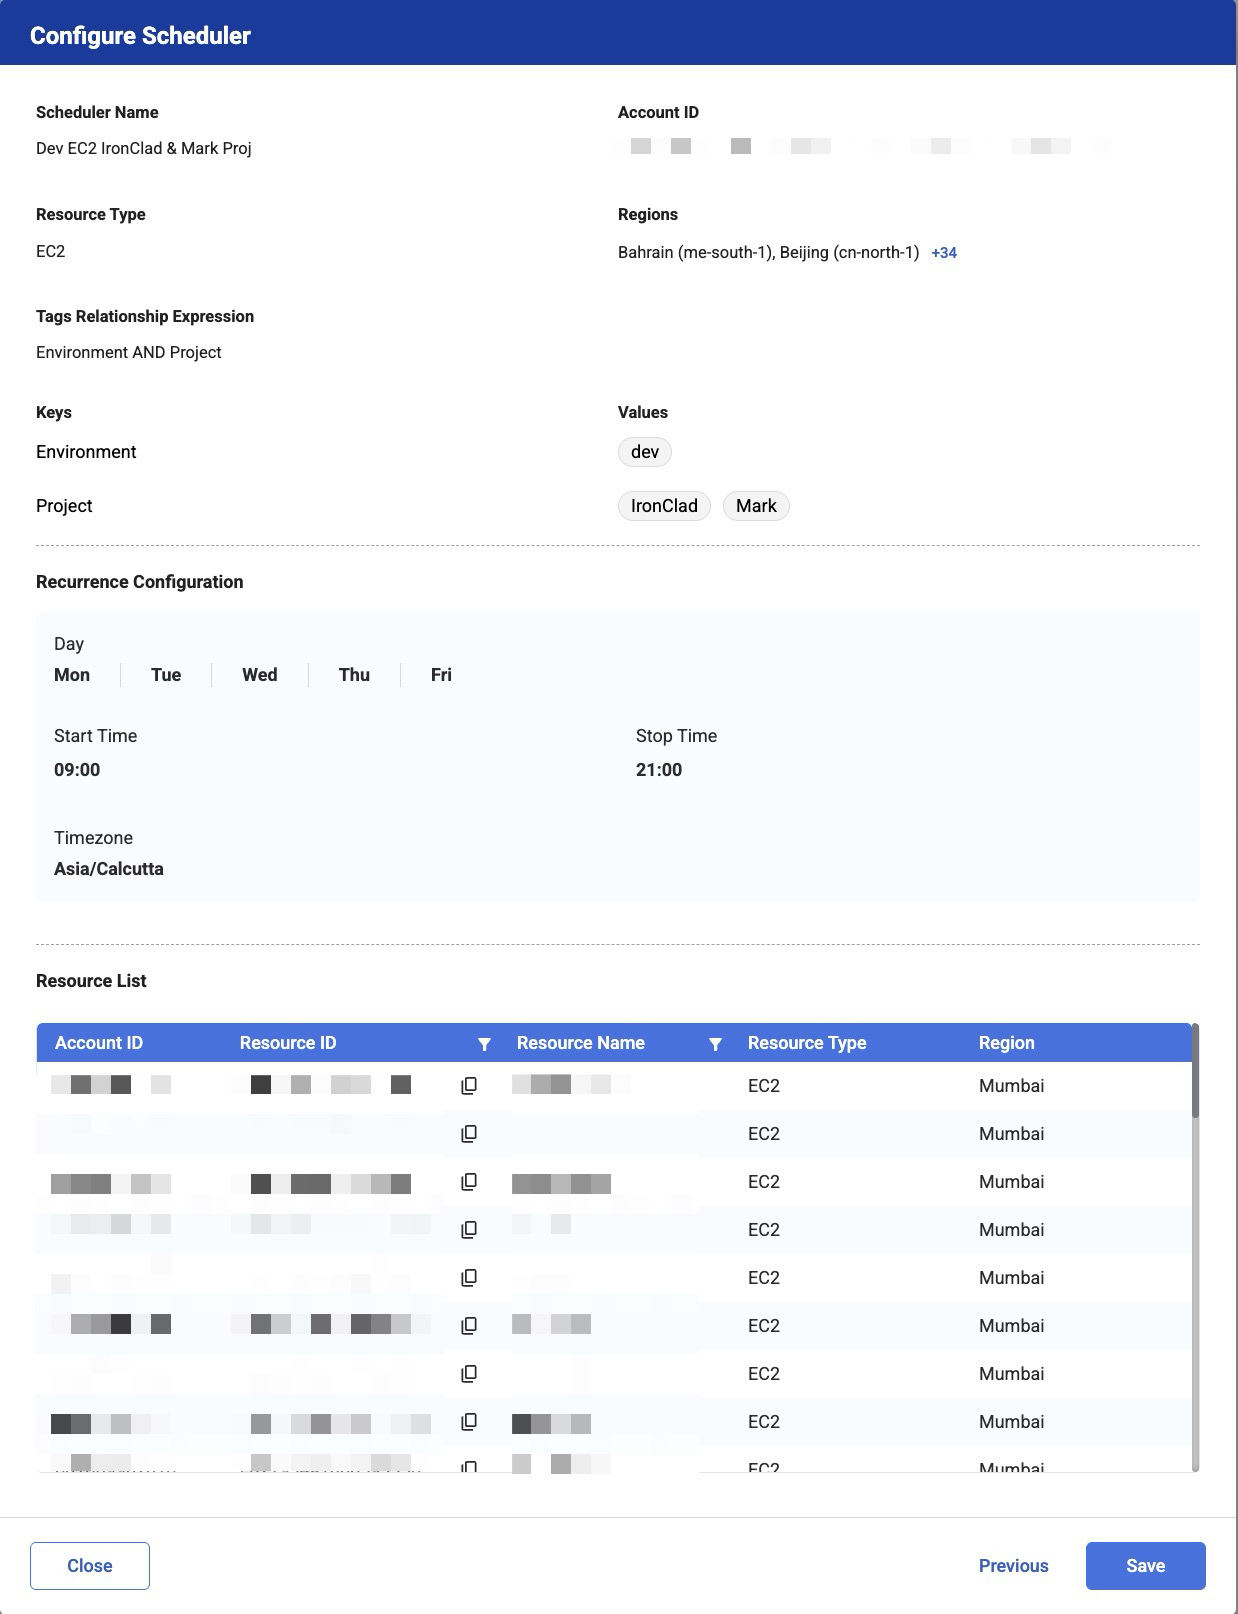
Step 5 — Review and Save
In the final screen, you’ll see a preview of all the resources that the scheduler will act on, along with a summary of your configuration.
After reviewing the configuration and resource list, simply click Save to enable the scheduler.
From now on, any new resource matching your tag pattern will automatically fall under the same schedule, keeping your environments consistent and cost-efficient without manual work or reconfiguration.